Article (posts) Editor
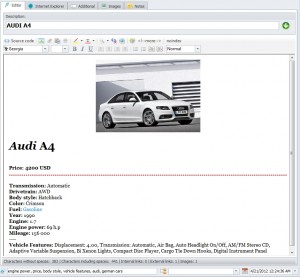
Article editor allows changing the properties of the article pages, their text, etc. It looks as follows:
The upper part of the window contains the name of the page and its properties (title, keywords, and description) which can be seen after having expanded the panel (press the button next to the title); alt name – NC page name. It is generated automatically depending on the field title, but can be changed by the user. The field description, depending on the program settings, can be generated automatically as well.
Text editor allows changing the source code of the article page. For this purpose the menu is used:
This menu contains the buttons which define such properties as bold, italics, underlining, centering the text, and allow to insert pictures and links (both external and internal). There are also menu entries that frame the selected text with a tag p or divide it into paragraphs.
Custom buttons can be added to this menu. See the link to below: http://zebroid.us/page/custom-buttons-of-the-editor
In visual editor horizontal red line shows the place of dividing an article into “notice” and “full”. In the source code it is the tag. If your CMS does not support such format of article division, this tag will be simply ignored.
At the bottom of the window there are 3 fields: tags, additional categories and article publication date.
The bookmark Internet Explorer (in the upper edge of the window) – allows to see how the page will look on the site.
Additional categories
It is important for the posts to have a few parent categories (the so-called multicategories). However, the project tree will have no duplicate posts (those placed in different categories, but in fact, being one article). By clicking “additional categories” you can see the list of categories, and how the current article relates to each of them.
To select or deselect just click the checkbox in front of the needed category. You can also use the tool of automation – Auto categories.
Image Editor
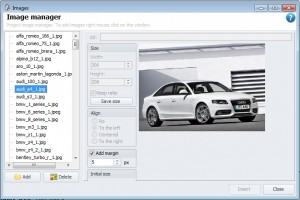
In the left of the window there is a list of all the images used in the project. It allows avoiding image duplication, since for different articles the same images can be used by simply selecting them in this window. In the right – preview of the selected image.
Context menu (which opens after clicking the right mouse button on the image list) helps to manage the needed files in the current project.
Adding an image you need to mention its attributes for an article. The Alt of an image, its width, height and aligning are to be mentioned when adding an image. If the function "Edit physically" is active – the size of the image will not be changed in the attribute settings, but the image will be changed itself, i.e. it will be reduced to the specified size.
After clicking the OK button the image link will be created in the article body with the selected attributes:
Keep in mind that the images that are not used anywhere in the project, after being saved, will be deleted (from the project only).
Link editor
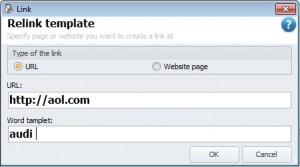
Link editor allows creating external links (URL switcher) or internal links (website page switcher). To create an external link enter the address and click the Ok button.
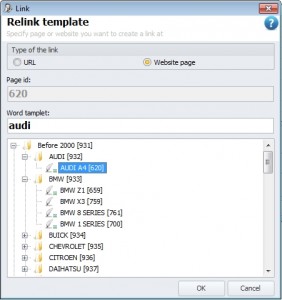
To create an internal link select a website page in the tree. In the field of the page ID will contain an identificator to identify the link while project exporting.
When creating external links there is a possibility to set a nofollow parameter. One thing should be also mentioned – when editing the link with the help of this window (it can be called from the visual window) there will be no possibility to set/delete this parameter. It is a result of the use of the InternetExplorer engine as a visual editor.


